Moving to a new home sounds simple enough, just pack your things and go. Yet most people find themselves surrounded by far more belongings than they ever imagined, leading to last minute chaos and unexpected costs. What surprises many isn’t how much you move, but what you forget to plan for. Skip the common mistakes and discover the overlooked tactics that transform any move from overwhelming to effortless.
Table of Contents
- Step 1: Assess Your Current Situation
- Step 2: Create A Detailed Moving Timeline
- Step 3: Purge Unwanted Items Strategically
- Step 4: Organize Packing Supplies Efficiently
- Step 5: Label Boxes Clearly For Easy Unpacking
- Step 6: Review And Finalize Moving Logistics
Quick Summary
| Key Point | Explanation |
|---|---|
| 1. Conduct a thorough inventory | Systematically assess all belongings to understand what you have. This helps in planning for transport, storage, or disposal effectively. |
| 2. Create a detailed moving timeline | Establish a timeline starting eight weeks prior to your move, covering all critical tasks to stay organized and reduce stress during the transition. |
| 3. Purge unnecessary items strategically | Sort belongings into keep, donate, and discard categories to simplify the move and reduce costs associated with transporting excess items. |
| 4. Organize packing supplies efficiently | Set up a central packing station with adequate high-quality materials. This ensures you have everything you need to pack without last-minute scrambling. |
| 5. Label boxes clearly for easy unpacking | Use a comprehensive labeling system to indicate contents and room destinations, making the unpacking process straightforward and efficient. |
Step 1: Assess Your Current Situation
Successful moving organization starts with a comprehensive assessment of your current living situation. This critical first step allows you to create a strategic plan that transforms a potentially chaotic moving experience into a smooth, manageable transition.
Begin by conducting a thorough inventory of your belongings, systematically examining each room and space in your current home. Walk through each area with a critical eye, understanding that every item represents a decision about transportation, storage, or potential disposal. Avoid the common mistake of underestimating the volume of possessions you’ve accumulated over time. Most people discover they own significantly more items than they initially remember.
As you assess your belongings, categorize them into clear groups: items to keep, donate, sell, or discard. This approach helps streamline your moving organization strategy and reduces unnecessary transportation costs. Pay special attention to bulky furniture, sentimental items, and rarely used possessions that might complicate your move.
Consider your new living space’s dimensions and layout when evaluating your current belongings. Measure large furniture pieces and compare them against the rooms in your destination. This proactive step prevents last minute surprises and allows you to make informed decisions about what will realistically fit in your new home.
According to UK Government Moving Guidance, creating a comprehensive inventory also serves essential documentation purposes. Take photographs of valuable items, record serial numbers for electronics, and maintain a digital or physical record of your belongings. This documentation becomes invaluable for insurance purposes and helps track your possessions during the moving process.
Finally, assess your personal moving capacity and resources. Determine whether you’ll need professional movers, rental trucks, or assistance from friends and family. Understanding your logistical constraints early helps you plan more effectively and avoid last minute complications. Your goal in this initial assessment is to transform an overwhelming task into a structured, manageable process that sets the foundation for a stress free relocation.
Step 2: Create a Detailed Moving Timeline
A strategic moving timeline transforms a potentially chaotic relocation into a structured, manageable process. This crucial planning phase acts as your personal roadmap, ensuring no critical task falls through the cracks and reducing stress during your transition.

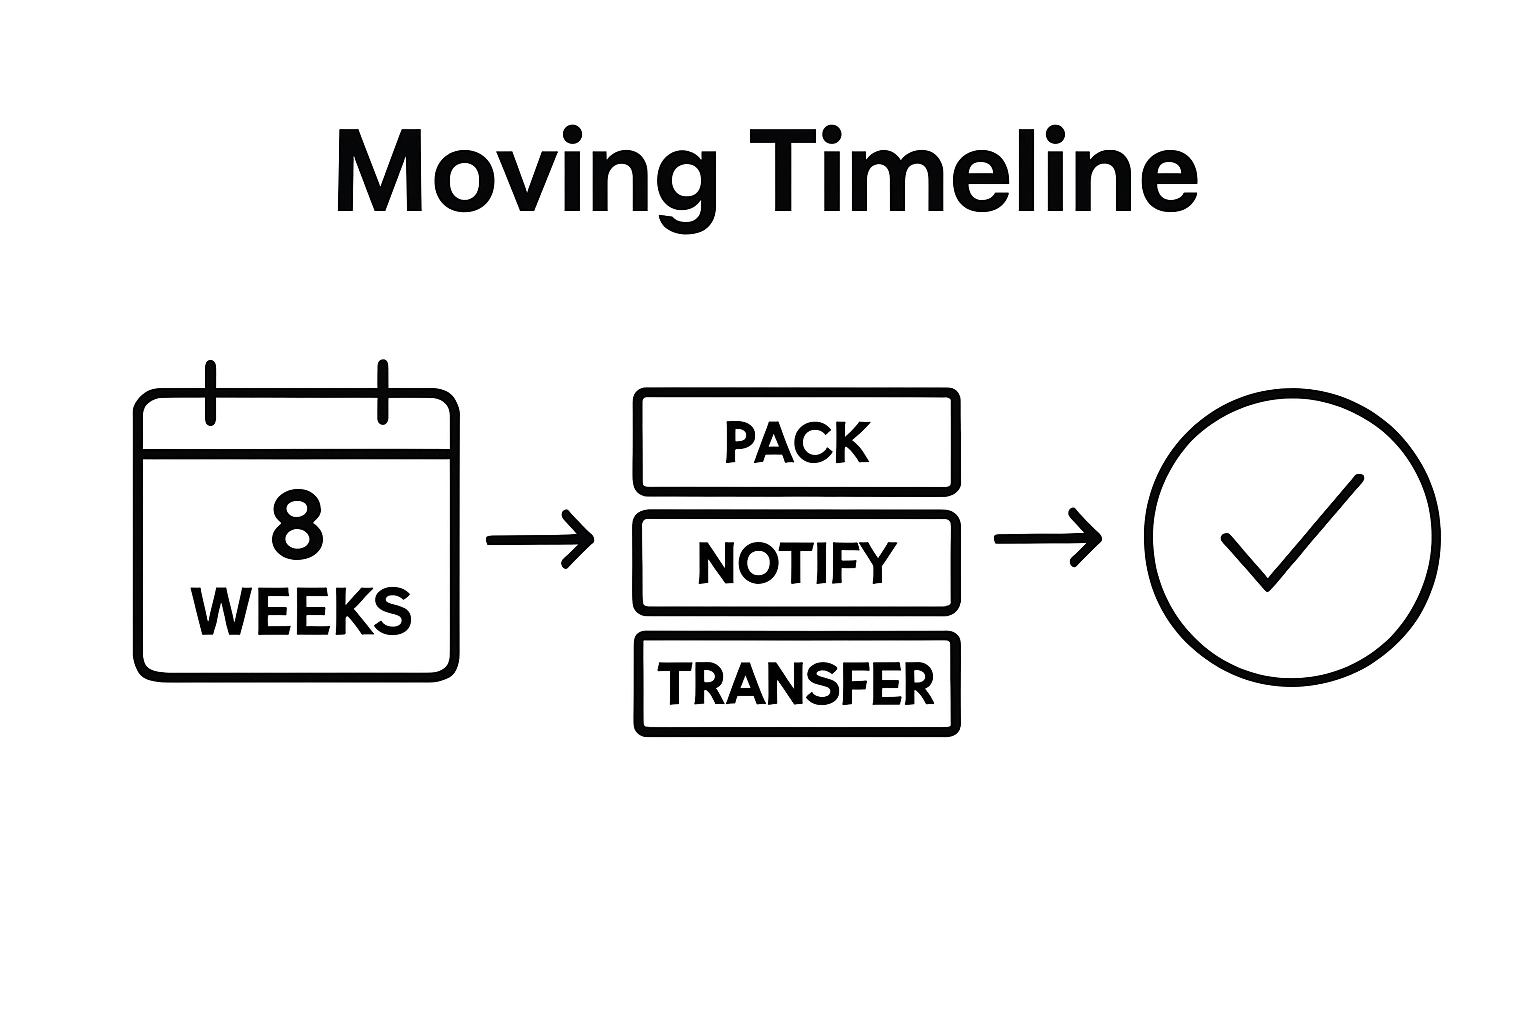
Start by establishing a comprehensive timeline that begins approximately eight weeks before your moving date. Digital calendar tools or specialized moving apps can be invaluable in tracking and managing your progress. Break down your moving preparation into distinct phases, allocating specific weeks or days for key activities like packing, sorting, notifying service providers, and handling administrative tasks.
Within your timeline, prioritize tasks based on their complexity and time sensitivity. Begin with longer term responsibilities such as transferring medical records, updating legal documents, and arranging school or work transitions. These administrative tasks often require substantial lead time and can significantly impact your overall moving experience if not addressed early.
As you develop your timeline, create a visual representation that allows for flexibility. Color code different categories of tasks—red for urgent items, yellow for ongoing activities, and green for completed tasks. This approach helps you track progress at a glance and quickly identify areas requiring immediate attention.
According to UK Government Moving Guidance, creating a detailed timeline also involves anticipating potential challenges. Include buffer periods between major tasks to accommodate unexpected delays or complications. Consider factors like potential work commitments, family responsibilities, and seasonal variations that might impact your moving schedule.
Key milestones to include in your timeline should cover:
- Scheduling professional movers or rental equipment
- Completing initial packing for non essential items
- Arranging utility transfers and service disconnections
- Updating address information with critical institutions
Review and adjust your timeline weekly, treating it as a living document that evolves with your moving preparation. The most successful moving experiences result from consistent planning, proactive problem solving, and maintaining a flexible yet structured approach to relocation.
To help you plan and track your relocation more efficiently, here is an overview of the essential steps in the moving process, along with suggested timing and primary outcomes.
| Step | Suggested Start Time | Key Outcome |
|---|---|---|
| Assess Current Situation | 8 weeks before move | Comprehensive inventory, categorized belongings |
| Create Detailed Moving Timeline | 8 weeks before move | Structured, prioritized schedule for all moving tasks |
| Purge Unwanted Items | 6-7 weeks before move | Reduced volume, donated/sold/discarded unnecessary items |
| Organize Packing Supplies | 5-6 weeks before move | Centralized station, complete supply inventory |
| Label Boxes Clearly | During packing phase | Color-coded, itemized labeled boxes for streamlined unpacking |
| Review & Finalize Moving Logistics | 1-2 weeks before move | Verified arrangements, backup plans, and documentation |
Step 3: Purge Unwanted Items Strategically
Purging unwanted items is a transformative process that dramatically reduces moving complexity and potential transportation costs. This step requires emotional discipline and a systematic approach to decluttering, helping you transition into your new space with only the most meaningful and functional possessions.
Begin by creating three distinct sorting categories: keep, donate, and discard. Approach each room with a ruthless yet thoughtful mindset, critically evaluating each item’s utility, sentimental value, and practical relevance to your future living space. The goal is not to create unnecessary waste but to streamline your belongings.
Start with areas that accumulate the most unnecessary items—closets, storage spaces, and rarely used rooms. Examine clothing, kitchenware, books, and decorative items with an objective eye. Ask yourself pointed questions: When was the last time I used this? Does this item represent my current lifestyle? Would I purchase this again today?
Consider the financial and emotional weight of transporting items you no longer need. Larger furniture pieces or rarely used electronics might cost more to move than replace. Create a monetary threshold for deciding whether to move or sell an item. For instance, if replacing something costs less than the moving expense, consider selling or donating it.
For items with sentimental value, take photographs or create digital memories to preserve emotional connections without physical clutter. This approach allows you to maintain meaningful memories while reducing physical possessions.
Donation and selling platforms offer excellent alternatives to discarding items. Local charities, online marketplaces, and community exchange groups provide opportunities to responsibly rehome belongings. Check out our guide on home organization for additional strategies in managing your possessions.
Key purging principles to remember:
- Be honest about item usage and necessity
- Consider replacement cost versus moving expense
- Prioritize functionality over sentimentality
- Create digital memories for sentimental items
Successful purging transforms your move from a logistical challenge into an opportunity for personal reinvention, ensuring you enter your new space unburdened by unnecessary possessions.
Step 4: Organize Packing Supplies Efficiently
Organizing packing supplies is a strategic process that transforms your moving preparation from chaotic to controlled. Proper supply management can significantly reduce stress and prevent last minute scrambling, ensuring you have exactly what you need when you need it.
Begin by creating a dedicated packing station in a central area of your home. This centralized space becomes your command center for boxing up belongings, allowing you to track progress and maintain organization throughout the moving process. Select a location with ample workspace, good lighting, and proximity to the items you will be packing.
Invest in high quality packing materials that provide genuine protection for your belongings. Prioritize sturdy boxes in multiple sizes, strong packing tape, bubble wrap, and clean packing paper. Avoid using old or damaged boxes that might compromise your items during transit. Consider purchasing specialty boxes for fragile items like dishes, artwork, or electronics.
Establish a systematic approach to collecting and organizing supplies. Purchase slightly more materials than you initially estimate to account for unexpected needs. Create a small inventory tracking system where you record the number of boxes, rolls of tape, and protective wrapping you acquire. This prevents unnecessary repeat purchases and helps you budget your moving expenses.
Stay on top of moving supply needs with this quick reference table detailing essential packing materials, their typical uses, and special notes for effective and safe relocation.
| Supply | Purpose | Special Notes |
|---|---|---|
| Multiple box sizes | Packing items of various dimensions | Use sturdy, high-quality boxes |
| Heavy duty packing tape | Sealing boxes securely | Avoid thin or aged tape |
| Bubble wrap | Protecting fragile items | Especially for dishes, artwork, electronics |
| Packing paper | Wrapping delicate belongings | Prevents scratches, fills empty spaces |
| Permanent markers | Labeling boxes | Use high visibility colors |
| Specialty protective materials | Safeguarding valuables/odd shapes | Dish packs, electronics sleeves, etc. |
According to UK Government Moving Guidance, documenting your packing supplies also serves important administrative purposes. Keeping receipts and tracking your moving expenses can provide potential tax benefits or reimbursement opportunities.
Implement a color coding or labeling system for your packing supplies. Use different colored tape or markers to distinguish boxes by room or fragility level. Learn more about maximizing storage solutions to enhance your packing efficiency.
Key supplies to gather:
- Multiple box sizes
- Heavy duty packing tape
- Bubble wrap
- Packing paper
- Permanent markers
- Specialty protective materials
Remember that efficient supply organization is about creating a smooth, predictable packing experience. By preparing thoroughly and strategically, you transform a potentially overwhelming task into a manageable, even enjoyable, process of preparing for your new chapter.
Step 5: Label Boxes Clearly for Easy Unpacking
Labeling boxes is the strategic bridge between packing and settling into your new home, transforming a potentially chaotic moving experience into a smooth, organized transition. Effective labeling goes far beyond simply writing the room name on a box—it requires a thoughtful, comprehensive approach that anticipates your future unpacking needs.
Develop a comprehensive labeling system that provides maximum information at a glance. Use high visibility markers or printed labels that clearly indicate the box’s destination room, contents, and handling instructions. Color code your labels to create an instant visual reference system—for instance, blue for kitchen items, green for bedroom belongings, and red for fragile objects requiring special care.
Create a detailed inventory alongside your labeling process. Number each box and maintain a corresponding digital or physical spreadsheet that tracks its contents. This approach becomes invaluable if you need to locate specific items quickly or if a box goes missing during transit. Include not just the general category but specific details about the contents, which can save hours of searching during unpacking.
Consider the practical logistics of your labeling strategy. Label boxes on multiple sides to ensure visibility regardless of how they are stacked or positioned. Include additional critical information such as whether items are heavy, fragile, or require immediate unpacking. This extra effort prevents potential mishandling and helps movers or helpers understand how to manage each container.
According to UK Government Moving Guidance, maintaining a systematic labeling approach also serves important documentation purposes. Your detailed records can assist with insurance claims, tracking, and personal organization during the transition.
Explore our storage container solutions to complement your labeling strategy and enhance overall moving organization.
Key labeling principles to remember:
- Use permanent, high visibility markers
- Label multiple sides of each box
- Include room destination and contents
- Mark fragile or special handling items
- Create a digital inventory spreadsheet
A meticulously labeled moving system transforms an overwhelming task into a structured, manageable process, ensuring you start your new chapter with clarity and confidence.

Step 6: Review and Finalize Moving Logistics
Reviewing and finalizing moving logistics represents the critical bridge between planning and execution, transforming your carefully crafted moving strategy into a tangible, actionable plan. This step demands meticulous attention to detail and proactive problem solving, ensuring every logistical element is carefully considered and addressed.
Begin by creating a comprehensive master checklist that consolidates all moving related tasks and requirements. This document becomes your central reference point, tracking everything from utility transfers and address changes to transportation arrangements and equipment needs. Digital spreadsheet tools can be invaluable for maintaining a dynamic, easily updatable moving logistics overview.
Contact all relevant service providers to confirm and reconfirm critical details. This includes moving companies, utility services, postal forwarding, insurance providers, and any specialized transportation needs. Verify pickup and delivery dates, confirm exact costs, and discuss any potential contingencies or special handling requirements for fragile or valuable items.
Prepare a detailed personal travel plan that coordinates with your moving logistics. Determine transportation methods, travel routes, overnight accommodations if necessary, and create buffer times for unexpected delays. Consider factors like vehicle transportation, pet relocation, or special equipment moving requirements that might complicate your primary moving strategy.
According to UK Government Moving Guidance, maintaining comprehensive documentation throughout this process serves both logistical and potential legal purposes. Keep copies of all contracts, estimates, and communication records in both physical and digital formats.
Ensure you have backup plans for potential scenarios. This might include alternative moving dates, backup transportation options, or temporary storage solutions. Flexibility becomes your greatest asset during complex moving operations.
Key logistical verification points:
- Confirm all moving company details
- Verify utility transfer dates
- Double check address change notifications
- Prepare contingency transportation plans
- Organize critical document backups
Completely reviewing and finalizing your moving logistics transforms an overwhelming process into a structured, manageable transition, positioning you for a smooth and stress free relocation experience.
Transform Your Move with Effortless Organization
Ready to turn your relocation stress into seamless success? Many readers come here searching for real solutions to challenging moves. Whether you are battling clutter or worried about protecting precious items during the move, the steps outlined above highlight just how key smart storage and clear labeling can be. If your main goal is to simplify unpacking and safeguard your memories, you need storage you can depend on. Bedroom Storage from BLUSHBEES offers expertly designed bins and boxes to make sorting and finding your essentials a breeze. Don’t let the anxiety of moving day catch you off guard—bring order to every room!

Take action now. Take advantage of our latest Deal Of The Week for instant savings or browse the complete organization collection at blushbees.us. Make your next move your best move. Browse today for smart solutions that will help you organize, protect, and beautify your space from day one.
Frequently Asked Questions
How can I assess my current situation before moving?
Start by conducting a thorough inventory of your belongings, categorizing items into groups such as keep, donate, sell, or discard. Measure large furniture pieces against the dimensions of your new space to ensure they will fit, and document valuable items for insurance purposes.
What should be included in a detailed moving timeline?
Your moving timeline should include key milestones such as scheduling movers or rental equipment, packing non-essential items, updating address information, and transferring utilities. Aim to start this timeline approximately eight weeks before your moving date.
What are effective strategies for purging unwanted items?
Create categories for your items: keep, donate, and discard. Evaluate each item based on its utility and relevance to your new living space. Consider the cost-effectiveness of transporting versus replacing larger items and take photographs of sentimental possessions to preserve memories without retaining physical clutter.
Why is labeling boxes important during a move?
Labeling boxes clearly helps streamline the unpacking process by providing essential information such as room destination and contents. Use a color-coding system and document each box’s contents in a separate inventory to quickly locate items once you arrive at your new home.


