

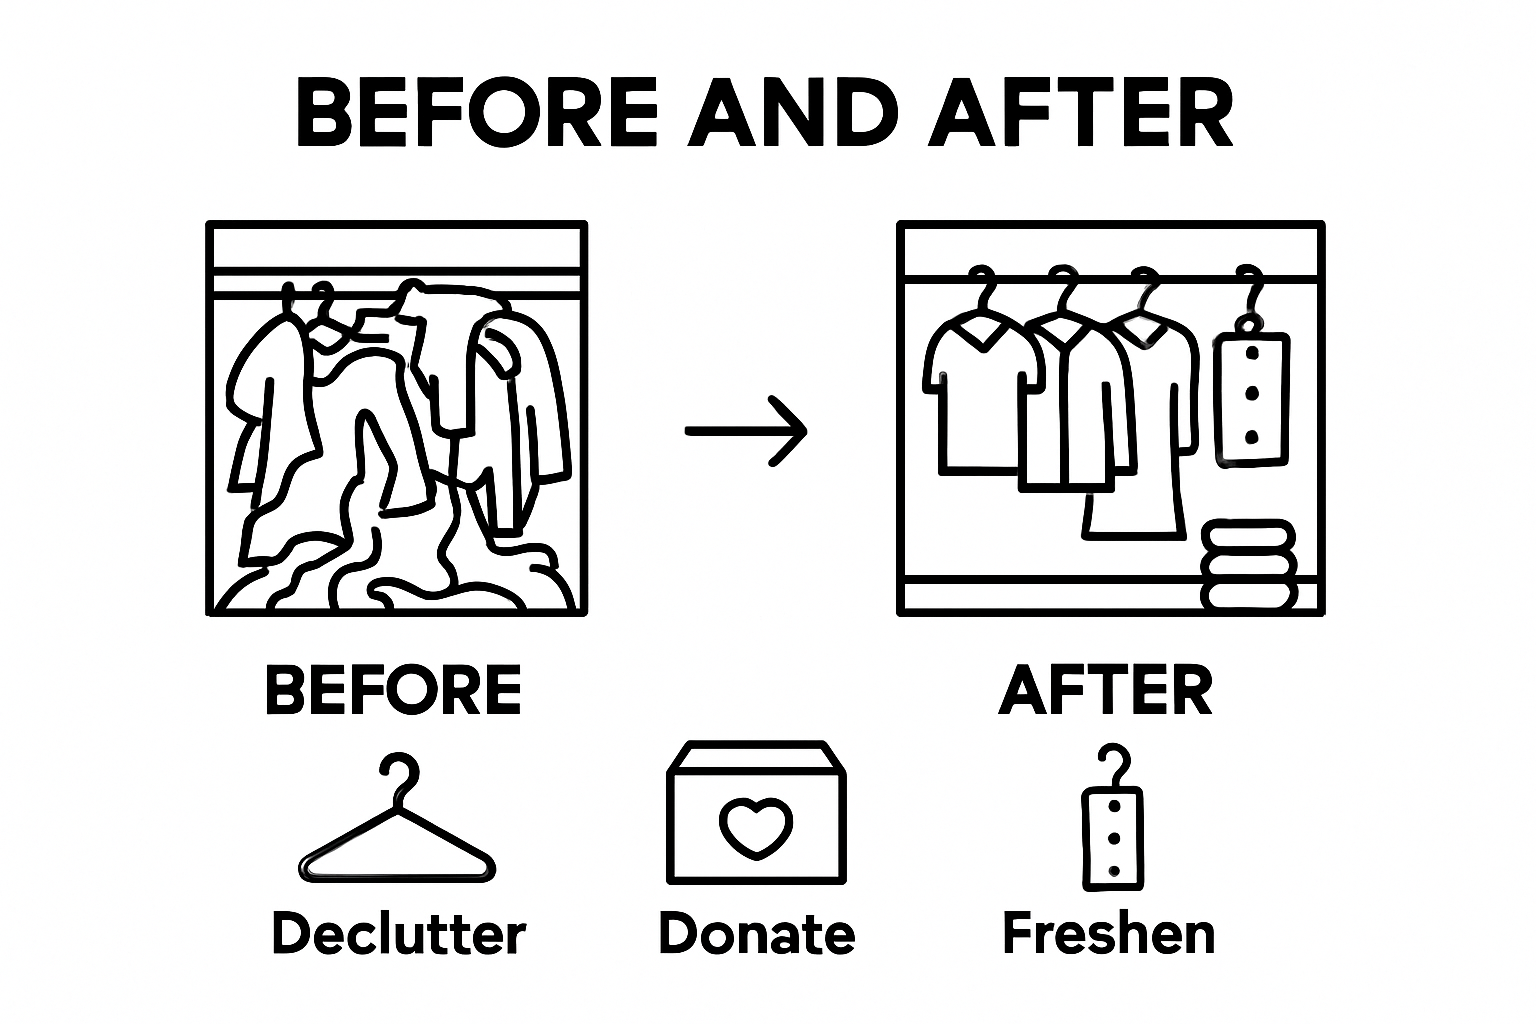
A messy closet can steal your mornings and bury your favorite outfits beneath piles of clothes you never wear. Sounds daunting, right? But the real shock is that most people only use about 20 percent of what is actually in their closets. Take everything out, and you will see just how much space and potential has been hiding in plain sight.
Table of Contents
- Step 1: Empty Your Closet Completely
- Step 2: Clean The Interior Surfaces
- Step 3: Sort Items Into Keep, Donate, And Discard
- Step 4: Organize Items By Category And Frequency Of Use
- Step 5: Implement Freshening Solutions
- Step 6: Check For Accessibility And Aesthetics
Quick Summary
| Key Point | Explanation |
|---|---|
| 1. Empty your closet completely | Remove all items to gain a clear view of your space and understand what you own. |
| 2. Clean the interior thoroughly | Dust and disinfect surfaces to create a fresh foundation that protects your clothes. |
| 3. Sort items into three categories | Create designated piles for keeping, donating, and discarding to curate a functional wardrobe. |
| 4. Organize by category and use frequency | Arrange clothes by type and accessibility to make getting dressed quick and easy. |
| 5. Finalize with accessibility and aesthetics | Enhance your closet’s appearance and ensure ease of use with thoughtful organization and decor. |
Step 1: Empty Your Closet Completely
Emptying your closet completely is the foundational step in creating an inviting and organized storage space. This process might seem overwhelming, but it is crucial for thoroughly understanding what you own and creating a fresh, functional environment. By removing every single item, you gain a comprehensive view of your space and set the stage for a transformative organizational journey.
Begin by clearing your schedule and allocating sufficient time for this task. Depending on the size of your closet, you might need two to three hours of uninterrupted work. Gather some essential supplies before starting: large trash bags, donation boxes, and sorting containers. You will want separate containers for items you plan to keep, donate, discard, or repair.
Discover expert closet organization strategies that can help streamline this process. As you remove items, place them on a clean, flat surface like your bed or a large table. This allows you to see everything clearly and prevents items from becoming mixed up or falling on the floor. Work systematically by removing items from top to bottom, starting with high shelves and working your way down to the floor. Take each piece of clothing, accessory, and storage container out individually, examining its condition and relevance to your current lifestyle.
As you empty the closet, conduct a quick initial assessment of each item. Ask yourself critical questions: When was the last time I wore this? Does it fit? Is it damaged? Does it make me feel confident? By being ruthlessly honest with yourself, you create space for items that truly serve you. This process is not just about physical organization but also about curating a wardrobe that reflects your current self and aspirations.
Once everything is out, take a moment to appreciate the empty space. Clean the bare closet thoroughly using a vacuum, dusting cloth, or mild cleaning solution to remove dust, cobwebs, and any accumulated grime.
Here is a concise tools and materials table summarizing the cleaning supplies used to refresh your closet’s interior.
| Tool/Material | Purpose | Special Instructions |
|---|---|---|
| Microfiber cloths | Remove dust and clean surfaces | Use dry for dust, damp for grime |
| All-purpose cleaner | Disinfect and clean all surfaces | Test on small area first |
| Warm water | Dilute cleaners and rinse surfaces | Use with cloth or brush |
| White vinegar | Natural cleaning and odor removal | Dilute before applying |
| Soft-bristled brush | Clean corners and stubborn spots | Gently scrub without scratching |
| Disinfectant spray (optional) | Eliminate germs and bacteria | Use for extra sanitation |
| Wood-specific cleaner (optional) | Clean and preserve wood surfaces | Use only on wooden areas |
Step 2: Clean the Interior Surfaces
Cleaning the interior surfaces of your closet is more than a simple dust removal task. It is about creating a pristine foundation for your newly organized space and preventing potential damage to your clothes from dirt, mildew, or hidden debris. This step transforms your closet from a mere storage area into a carefully maintained personal sanctuary.
Preparation is key for an effective cleaning process. Gather your cleaning supplies before starting: microfiber cloths, an all-purpose cleaner, a small bucket, white vinegar, warm water, a soft-bristled brush, and optional disinfectant spray. If your closet has wood surfaces, consider having wood-specific cleaner on hand. Learn more about efficient home cleaning techniques to enhance your approach.
Start by dry cleaning the surfaces. Use a microfiber cloth or soft brush to remove loose dust and cobwebs from walls, shelves, corners, and baseboards. Pay special attention to areas behind hanging rods and in deep corners where dust tends to accumulate. For stubborn dirt or scuff marks, create a gentle cleaning solution by mixing warm water with a small amount of mild dish soap or white vinegar. Always test your cleaning solution on a small, inconspicuous area first to ensure it does not damage the surface material.
When wiping down surfaces, work systematically from top to bottom to prevent re-depositing dust onto already cleaned areas. Use circular motions with your cloth, applying gentle pressure to lift dirt without scratching surfaces. For wooden shelves or surfaces, avoid saturating the material with liquid. Instead, use a slightly damp cloth and immediately dry the area to prevent water damage or warping. Pro tip: If you encounter any mildew or persistent stains, a mixture of water and white vinegar can be an effective and natural cleaning solution.
After thoroughly cleaning all surfaces, allow the closet to air dry completely. Open any windows or doors to promote ventilation and speed up the drying process. Once dry, do a final visual and tactile inspection to ensure no dirt or cleaning residue remains. Your clean, fresh closet is now ready for the next step in your organizational journey.
Step 3: Sort Items into Keep, Donate, and Discard
Sorting your closet items is a transformative process that goes beyond simple organization. This step is about creating intentional space in your life, keeping only items that serve a genuine purpose, bring joy, or contribute positively to your personal style. The goal is to curate a wardrobe that truly reflects who you are right now, not who you were years ago or who you might become.
Learn more about mastering home organization as you embark on this critical sorting journey. Begin by creating three distinct sorting areas: one for items you will keep, another for donations, and a final space for items to discard. Use large, clearly labeled containers or bags to prevent confusion. Start with clothing, methodically examining each piece with a critical eye. Ask yourself meaningful questions: Does this item fit my current body and lifestyle? Have I worn it in the past year? Does it make me feel confident and comfortable?
Develop a strategic approach to sorting. For clothing, consider the one-year rule: if you have not worn an item in the past 12 months, it likely does not deserve space in your closet. Be honest about sentimental items. While it is tempting to keep every memory-laden piece, consider taking photographs of meaningful clothing to preserve the sentiment without maintaining physical clutter. For items in good condition that no longer serve you, consider donation. Shelters, community centers, and charitable organizations often welcome clean, gently used clothing and accessories.
When deciding what to discard, be ruthless but practical. Damaged items beyond repair should be thrown away. For clothing with minor issues like missing buttons or small tears, decide quickly whether you will realistically repair them. If not, they belong in the discard pile. Pay special attention to undergarments, workout clothes, and basics that might be stretched, faded, or worn thin. These items often need more frequent replacement than statement pieces.
As you complete your sorting, take a moment to appreciate the clarity you have created. Your keep pile should represent clothes that fit well, make you feel fantastic, and align with your current lifestyle. The donation pile offers hope of helping others, while the discard pile represents letting go of what no longer serves you.
 This process is not just about managing clothing, but about making intentional choices that reflect personal growth and self-respect.
Step 4: Organize Items by Category and Frequency of Use
Organizing your closet by category and frequency of use transforms a chaotic storage space into a streamlined, functional system. This strategic approach ensures that the items you need most are always within easy reach while keeping less frequently used pieces neatly stored. The key is creating a logical organization method that reflects your daily life and personal style.
Discover innovative storage solutions that can elevate your organizational strategy. Begin by creating broad clothing categories such as work attire, casual wear, formal wear, seasonal clothing, and accessories. Within each category, further subdivide items by frequency of use. Your most-worn pieces should occupy the most accessible spaces like eye-level shelves or front-facing hanging rods. Consider creating a special section for grab-and-go outfits that you wear most frequently, ensuring these items are the most convenient to access.
Implement a visual and practical sorting system that makes selecting outfits effortless. For hanging items, arrange clothing from lightest to darkest colors or organize by type, such as shirts, pants, dresses, and jackets. Use matching hangers to create a uniform look that instantly makes your closet feel more organized. For folded items like sweaters and casual wear, consider using vertical storage methods that allow you to see everything at a glance. File-folding techniques can maximize shelf space and prevent wrinkles, making each item easily visible and accessible.
Think strategically about seasonal and occasional wear. Store out-of-season clothing in clearly labeled boxes or vacuum-sealed bags on higher shelves or in less prime closet real estate. For special occasion items like formal wear or winter coats, use garment bags or protective covers to keep them clean and ready for use. Pay attention to your shoes and accessories as well. Consider using shoe racks, clear boxes, or hanging organizers that keep these items visible and protected. The goal is to create a system where every item has a designated home, making it simple to maintain your newly organized space.
As you complete this organization process, step back and assess your new system. A well-organized closet should feel intuitive, with items flowing from most to least used. Each category should be clearly defined, and accessing your clothing should feel effortless. Your closet is now a personalized storage solution that reflects your lifestyle and makes getting dressed a joy rather than a chore.
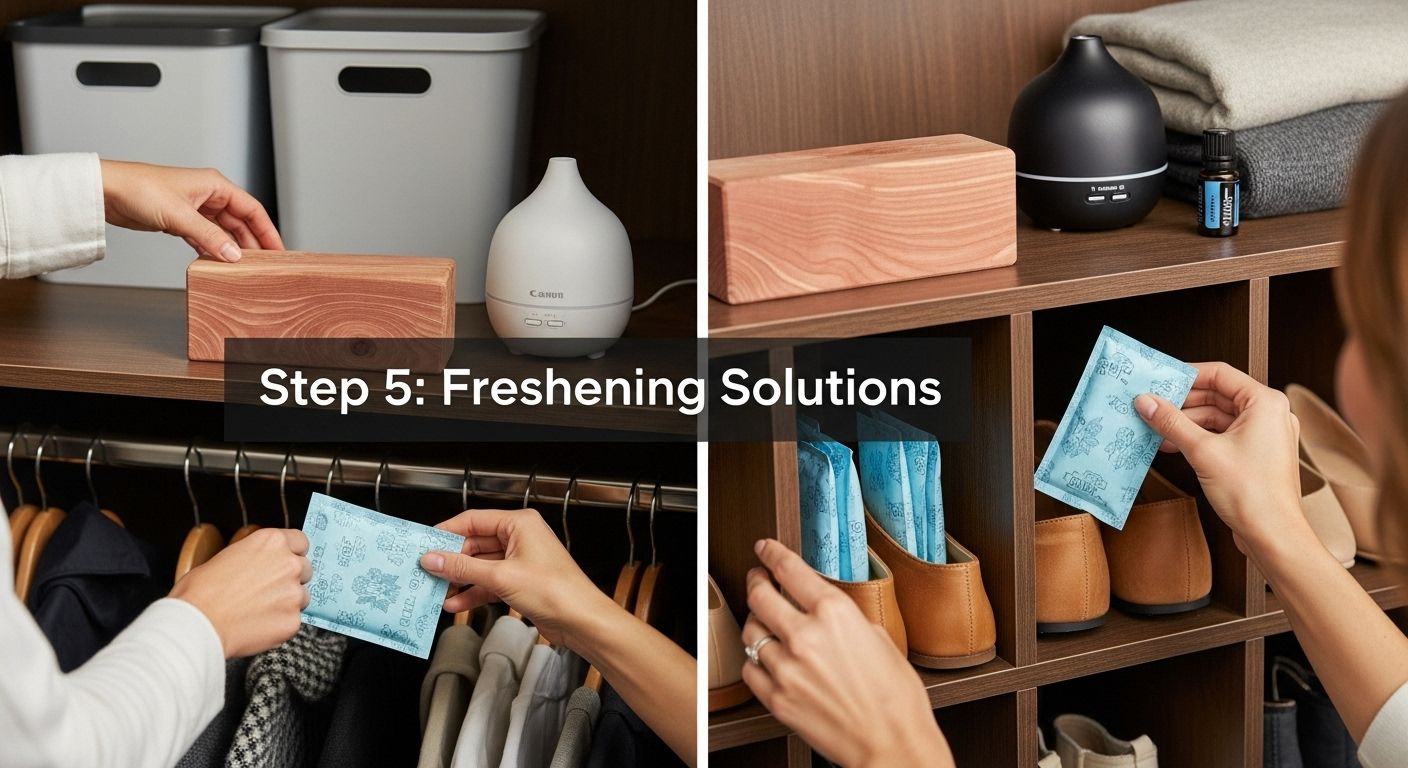
Step 5: Implement Freshening Solutions
Implementing freshening solutions transforms your closet from a simple storage space into a clean, inviting sanctuary that protects your clothing and creates an enjoyable sensory experience. The goal is to neutralize odors, prevent moisture buildup, and maintain a crisp, clean environment that keeps your garments in pristine condition.
Explore smart storage strategies that complement your freshening approach. Start by selecting natural and effective deodorizing methods. Cedar blocks or hangers are excellent for absorbing moisture and repelling insects while providing a subtle, pleasant woodland fragrance. For those sensitive to strong scents, activated charcoal bags offer an unscented solution that effectively absorbs excess moisture and neutralizes odors without introducing additional chemicals into your closet environment.
Create a multi-layered approach to keeping your closet fresh. Consider using moisture-absorbing silica gel packets in shoe boxes and storage containers to prevent dampness that can lead to musty smells or mildew. Essential oil diffusers with lavender, cedarwood, or eucalyptus can provide a gentle, natural fragrance while offering potential antimicrobial benefits. Rotate these options seasonally to maintain effectiveness and prevent your closet from developing stale odors.
Address potential humidity challenges by maintaining proper air circulation. If your closet tends to be damp, invest in a small dehumidifier or place moisture-absorbing products strategically. Consider leaving a small gap between hanging clothes to allow air movement, which prevents mustiness and reduces the likelihood of mold or mildew development. White vinegar can be an unexpected ally in this process; a small bowl of white vinegar placed in the closet can help neutralize strong odors without leaving a lingering vinegar smell.
As a final touch, develop a maintenance routine that keeps your freshening solutions active. Replace cedar blocks every six months, refresh activated charcoal bags quarterly, and periodically check moisture-absorbing packets. Your closet should now feel like a clean, inviting space that not only stores your clothing but also preserves its quality and provides a pleasant sensory experience every time you open the door.
Step 6: Check for Accessibility and Aesthetics
Accessibility and aesthetics are the final touches that transform a functional closet into a personalized, enjoyable space. This step is about creating a storage area that not only works efficiently but also brings you joy every time you open the door. The goal is to design a closet that makes selecting outfits effortless and visually pleasing.
Explore stylish home organization techniques to elevate your closet design. Begin by testing the accessibility of your newly organized space. Stand back and simulate real-world clothing selection scenarios. Can you easily reach frequently worn items? Are seasonal or special occasion pieces stored logically but not obstructing daily access? Consider the physical effort required to retrieve items. Your most-used clothing should be at eye level or in the most convenient reach, while less frequently worn pieces can be stored on higher or lower shelves.
Create a visual harmony that reflects your personal style. Implement a color-coordinated approach that makes your closet feel curated rather than chaotic. Consider using uniform hangers in a single color to create a clean, streamlined look. Arrange clothing by color gradient or type to create a visually appealing display that feels intentional. Introduce small decorative elements like a delicate scarf hung as an accent piece or a beautifully framed photograph that personalizes the space and makes opening your closet a moment of pleasure.
Pay attention to lighting and visibility. If possible, add soft, subtle lighting that illuminates your clothing without creating harsh shadows. Consider using battery-operated LED strip lights or motion-sensor lights that activate when you open the closet door. Clear storage containers, labeled elegantly, can help maintain visibility while keeping items protected. Test your organization by walking away and returning to see if the space feels intuitive and inviting. A well-designed closet should feel like an extension of your personal style, making the daily task of selecting clothing feel less like a chore and more like a curated experience.
This checklist summarizes the key criteria to verify for closet accessibility and aesthetics once you have completed your organization.
| Completion Criteria | What to Check | Status (✓/✗) |
|---|---|---|
| Easy reach for most-used items | Frequently worn clothes at eye level | |
| Logical storage of off-season items | Seasonal/special pieces stored but accessible | |
| Uniform hangers and color scheme | Consistent hanger type and pleasing arrangement | |
| Visual harmony and personalization | Decor or accents reflect your style | |
| Adequate lighting and visibility | Space is well-lit and easy to navigate | |
| Organized and labeled containers | Bins and boxes clearly identified | |
| Intuitive clothing flow | Categories and access align with daily routine |
As a final assessment, ask yourself if this space truly represents you. Does it make you smile? Does it simplify your morning routine? Your closet is now more than just a storage area it is a personalized sanctuary that reflects your lifestyle and aesthetic sensibilities.
Transform Your Closet Into a Fresh and Inviting Sanctuary
Struggling to keep your closet truly organized and inviting? If you feel overwhelmed by clutter, hidden odors, and wasted space, you are not alone. The article has shown how critical it is to empty your closet fully, sort with intention, and use freshening solutions for a wardrobe that matches your lifestyle, not your old habits. Achieving lasting results requires storage products that are as flexible and beautiful as your goals.
Experience the difference with our range of bedroom storage solutions designed to help you maintain order, cleanliness, and accessibility as described in each step. Our durable storage boxes, bins, and dividers will elevate your closet’s appearance and make every day feel effortless and refreshing.

Ready for a storage system that finally stays organized? Browse BLUSHBEES USA now and find the practical solutions that bring your inviting closet to life. Make your closet fresh, functional, and beautiful today—these results will last only if you take that first step. Explore our full collection and welcome clear space that sticks.
Frequently Asked Questions
How do I effectively empty my closet before organizing it?
To empty your closet effectively, allocate 2 to 3 hours of uninterrupted time, remove every item and assess its condition, and sort them into separate containers for keeping, donating, discarding, or repairing.
What supplies do I need for cleaning the interior surfaces of my closet?
You’ll need microfiber cloths, an all-purpose cleaner, warm water, white vinegar, a soft-bristled brush, and disinfectant spray if desired. Wood-specific cleaners are recommended for wood surfaces.
What is the best way to sort items in my closet?
Create three distinct sorting areas for items to keep, donate, and discard. Utilize criteria such as whether you’ve worn an item in the past year and whether it aligns with your current lifestyle.
How can I maintain a fresh scent and moisture control in my closet?
Use natural deodorizing methods like cedar blocks or activated charcoal bags to absorb moisture and odors. Consider utilizing moisture-absorbing silica gel packets in storage containers and keep the closet well-ventilated.

